Blog
 How this page works
More blog entries >>
05/29/2023 4:50 pm
At the public library where I work, I use a software product
called Porteus Kiosk for our catalog computers. It’s a free, Linux-based
operating system that makes it easy to lock down a computer and turn it into a
single-purpose device. Check out my previous blog post for more on that.
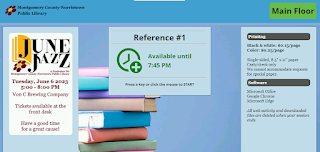
One of the many features Porteus supports is the ability to
set a webpage as the computer’s screensaver. I have seen other libraries utilize
the screensavers of their catalog computers for event promotion and such, so I
decided to do the same.
I knew what I wanted to do:
- Retrieve all WordPress posts that have a specific
category assigned (our library uses a WordPress website). This could be done using
the WordPress PHP API because the screensaver webpage is hosted on the same
server as the library website.
- Get the featured image URL of each post. These
are the images that will appear in the screensaver’s carousel.
- Display the featured images on a webpage in a slideshow
that advances automatically every 20 seconds using JavaScript.
Writing the WordPress PHP code
I had heard of programmers using ChatGPT to help them write
code (or do it for them, even). I started by asking ChatGPT:
“Give me some sample PHP code that retrieves all WordPress
posts tagged with a specific category.”
Its response was to give me code that accomplished this utilizing
WordPress’s REST API, along with a seemingly detailed and authoritative
explanation of how the code works. It really felt like I was reading something written
by a human being on a site like Stackoverflow.
However, I didn’t want to use the REST API, so I said,
“What about without using the REST API?”
It inferred what I meant based on the context of our conversation.
It revised its code sample to use the WordPress PHP API, which happened to be
what I was looking for. However, the code didn’t work. After a lot of troubleshooting
on my part, I discovered why. ChatGPT’s code used an incorrect keyword in the
WordPress query function call—“category” instead of “cat” to represent the
database ID of the category. I told ChatGPT its mistake,
“You were wrong about how to query based on category ID. The
array key is "cat" not "category".”
It quickly apologized, told me I was correct, provided the
corrected code, and apologized once more. Would it have responded in the same
way if I said it made a mistake when it really hadn’t?
Writing the JavaScript slideshow code
In a new chat conversation, I asked,
“Write Javascript code that generates a slideshow from a
list of images”.
And it did! But it didn’t quite give me what I wanted. The
slideshow I had in mind was one that advanced automatically every 20 seconds.
The code ChatGPT generated had “previous” and “next” buttons for advancing the
slides. So, I provided the following instruction,
“Remove the next and prev buttons. The slides should
automatically change every 20 seconds.”
And it did exactly that! After some work on my part to insert
the slider image URLs retrieved using the WordPress code, the slideshow actually
worked!
The results
Once I had a functioning event slider carousel up and
running, I worked on making the web page look pretty (*without* any help, thank
you) by adding the library’s logo, a nice background (as it turns out, photos
of bookshelves tile very nicely), and a large heading so patrons know what the
computer is for. You can see the final result here:
http://mnl.mclinc.org/opac/screensaver/screensaver.php?branch=MNL
05/20/2023 11:05 am
Porteus Kiosk is a software product that can be used to turn computers into “dumb” terminals that serve a single purpose. For example, showing a slide show on a large monitor in a hotel lobby or allowing customers to make appointments at a hair salon. It uses a very light-weight Linux operating system and utilizes either the Firefox or Chrome web browser. It only requires only 1 GB of hard disk space and 1 GB of RAM.
At the public library where I work, this product is perfect for the computers that patrons use to look up items in the library’s online catalog (referred to as "OPACs"--online public access catalogs). Gone are the days of jumping through a thousand hoops trying to properly lock down and administer an expensive and resource-heavy Windows computer. Porteus Kiosk is better in every way.
The way it works is you burn a 170 MB ISO to a flash drive (or an optical disk if you’re feeling nostalgic) and boot the flash drive on the kiosk computer. The kiosk image is configured using a special configuration file, which is just a plain text file with one setting per line. All of the settings are documented on their website.
Example configuration file:
kiosk_config=http://mywebsite.com/kiosk-config.txt
connection=wired
dhcp=yes
browser=firefox
mouse_cursor_size=large
homepage=https://www.google.com
The setup wizard allows you to provide this configuration file, but it
also provides a user-friendly GUI that allows you to browse the various
configuration settings that are available and set them as you wish. When you are done, it shows you the configuration file that it generates based on the settings you selected. You can then save it for later use.
Once the configuration settings have been provided, it prompts you to choose a partition on the hard drive on which to burn the kiosk image. You might think it would take a while to write an entire operating system to the hard drive, but it is very fast. On the 10+ year old machines I’ve put Porteus on, it takes less than a minute.
In order to reconfigure the kiosk (for example, changing the home page), you have to go through the entire process again—there’s no “administration settings” screen you can open while the kiosk is running. However, it is possible to host the configuration file on a web server and point the kiosk to this URL. When this is done, every time the kiosk boots, it checks to see if the configuration file has changed. If it has, it automatically re-images the machine with the new configuration. If it is unable to download the configuration file (due to the web server being down, for instance), it continues to use the last configuration file it downloaded and displays a warning message at the top of the screen for a few seconds after it boots.
Despite all the great things about Porteus, I did encounter one annoying issue related to the system clock. I have configured our computers to turn on automatically in the morning using the Auto-On settings in the BIOS. Every time the computer boots, Porteus syncs the system clock with internet time servers. This is good because most websites use HTTPS, and if the system clock is not set correctly, these sites will not load. However, it sets the system clock to UTC time, which means that the Auto-On time, which is defined in local time, no longer matches the system clock time. A workaround is to set the Auto-On time to be 4 hours ahead of local time (for example, setting it to 12 PM when I want the computers to turn on at 8 AM). However, this means that the computer will turn on an hour early during the other half of the year when our UTC offset is -5 instead of -4.
05/16/2023 11:12 am
I recently deployed a computer at the public library where I
work that allows patrons to pay for and release their own print jobs. Previously,
the print release system was managed by staff at the circulation desk, which meant
longer wait time for patrons and more work for staff.
The software can be confusing to install and configure.
But fortunately, I was able to figure it out myself and did not have to resort
to contacting Envisionware’s customer support for assistance. When you install
the software, you’re actually installing two separate pieces of software.
First, there is the actual LPT:One print release terminal software, which is what
patrons use to view and release their print jobs. Then, there is an optional piece
of software called Launch Command which should be installed if your print
release terminal is configured to be patron-facing instead of staff-facing.
Launch Command provides buttons for the user to click which launches
the print release software. Touch screen monitors are great for this, and I
have deployed one for our setup. The window fills up the entire screen, including
the task bar, to prevent users from accessing the Windows desktop. The buttons
are defined in a simple HTML file, which gives you a ton of flexibility to customize
this screen however you want. In fact, I highly recommend you do this because the
out-of-the-box screen is, let’s just say, very “1990”. I was surprised to find
that none of the public libraries I’ve visited in my area have customized this
screen at all.
Out of the box (shield your eyes, for the white background color may blind you):
My customizations:
The print release software is launched using an <a> tag
whose “href” attribute points to the print release software’s executable. This
means you could presumably use Launch Command for launching other programs too,
though I haven’t had a need to do this.
<a href="launch://C:\Program Files
(x86)\EnvisionWare\lptone\lptprt\lptprt.exe -host=192.168.1.11 -runmode=prompt
-locale:en_us">
As you can see from the code snippet above, it’s easy to change
the display language for the print release software by editing the “locale”
argument. Because we have many Spanish-speaking patrons, I added a second
button which launches the print release software in Spanish (use “es_us” for
Spanish). The software supports English, Spanish, French, Portuguese, PRC Chinese,
and Hong Kong Chinese.
Images used on this screen are stored in a location relative
to where the HTML file is stored. The images are referenced by relative path in
the HTML.
<img
src="../images/release-a-print-job.en-us.png" />
I don’t know how Launch Command renders the HTML. Does it
use its own web browser? I haven’t tried doing too many crazy things with the
HTML, but due to the program’s age, I wouldn’t be surprised if it lacks support
for modern web standards. For example, I tried to apply rounded-corner styling to some
images using the “border-radius” CSS property, but it had no effect.
04/30/2023 11:34 am
CloudNine is a software product developed by a company
called Envisionware. It is used to control access to public computers and other
devices. Its main customer base is public libraries. It supports a plethora of features
such as library card barcode authentication, setting session time limits, and setting
operating hours.
It is a new system that aims to replace the company’s legacy
software product, PC Reservation. The two products serve the same purpose but
are very different from each other. The main technical difference between the
two is that PC Reservation must run on a local server within the building premises,
whereas CloudNine (as you may have guessed from the “clever” name) is
administered over the internet. PC Reservation uses a native Windows
application to administer your public computers, whereas CloudNine uses a web-based
interface called the Web Console.
The Web Console is simply a website that you login to that allows
you to administer your computers. It organizes its settings in a hierarchical
fashion, which is particularly useful if your library system is composed of multiple
branch libraries. What this means is that you can define settings at the “top
level”, which all branches will inherit from. Then, you can choose to override
those settings individually at the branch level as needed. For example, if one
of your branch libraries wants to have a different session time limit than
everyone else, it’s easy to override that setting for that individual branch.
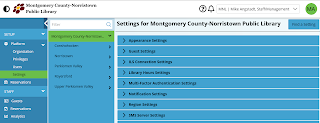
There are a TON of settings in the Web Console. Many are
self-explanatory, but unfortunately, documentation for these settings is currently
lacking. Each setting has tooltip text which is displayed when you point to the
setting in the UI, but the text is often redundant and not useful. For example,
the tooltip text for a setting called “URL for Logo” is unhelpfully “The URL to
an image that will be used for your logo.” It doesn’t say anything about what
image formats are supported or what the dimensions should be.
To install CloudNine onto a public computer, you first login
to the Web Console and add an entry for the computer to the list of reservable
computers. From there, you download a
Windows executable, which is what installs the CloudNine native client onto the
computer. The installation is straightforward and once installed, no additional
configuration is required. All settings, such as session time limits,
authentication rules, etc are pulled down from Web Console, so the client itself
doesn’t need to be configured at all. The client software will auto-update itself
as needed.
The CloudNine client is basically a lock screen that sits
overtop the Windows desktop that prevents you from interacting with the computer
until you login to it. You are not able to see the desktop or open the start
menu until you authenticate with CloudNine. Authentication is done using a
library card barcode number or a guest pass. Once you authenticate, the lock
screen goes away and you can use the computer like normal. (However, logging out
of the Windows user account will effectively end your CloudNine session because
CloudNine will relaunch when you log back into any Windows user account, at
which point you will have to login to CloudNine again to use the computer.)
The downside to CloudNine being cloud-based is that, if the
computer loses its internet connection, then it will not allow users to login
and use the computer. However, most of our patrons primarily use the computers
for internet access, so if our building loses internet, no one wants to use the
computers anyway. The same issue could occur if the CloudNine servers go down,
but server uptime has been stellar, and we’ve never had issues with that.
Overall, CloudNine is a very good product and I’m glad our
consortium decided to purchase it!
08/24/2021 10:52 am
Google Drive is a free cloud-based file storage service
provided by Google. It allows you to browse, upload, and download files in the
cloud using a web browser. For more convenient access to your files, Google
provides a Windows desktop application that allows you to access your Google
Drive files through File Explorer without needing to use a web browser.
This application used to be called “Backup and Sync”. A new
and improved version, not-so-creatively dubbed “Drive for desktop”, has
recently been released. This new version is considerably different from its
predecessor.
Streaming
The biggest improvement in my opinion is the ability to
stream files. With Backup and Sync, you had no option but to download a copy of
every single file to your computer (Drive for desktop calls this “mirroring”).
This approach is problematic if you are short on disk space or have a slow
internet connection. While Drive for desktop continues to support mirroring, it
also provides a second option called “streaming”. This means that the files are
only downloaded when you open them, saving a lot of disk space and bandwidth. Files
and folders that you need offline access to can be marked as such using the
right-click context menu.
Microsoft Office support
Another improvement is better integration with Microsoft
Office. When you have an Office file open, such as a Word document, Drive for
desktop will notify you if the file was changed by somebody else. This helps to
prevent you from blowing away edits made by somebody else you have shared the
file with. However, if you are doing a lot of collaboration work, I recommend
using Google’s web-based office suite instead (Google Docs, Google Sheets, etc),
as it handles simultaneous, collaborative editing much more effectively.
Backing up external drives
As with Backup and Sync, the new app makes it easy to back
up any external drives, like flash drives, that you plug into your computer.
Upon connecting a drive, a popup immediately appears asking if you want to back
the drive up or not. Unfortunately, unlike Backup and Sync, there is no option
to completely disable these notifications.
Location in File Explorer
An interesting change is where it puts the files in File
Explorer. With Backup and Sync, it simply stored the files in a folder at the
root of your user directory. Drive for desktop, however, takes the meaning of “drive”
quite literally: it stores the files in their own drive under “This PC”, as if
it were a flash drive or external hard drive. It assigns the drive to letter
“G” by default (for “Google” I presume), but it is possible to change the drive
letter in the settings. Every Google account you add gets its own drive with
its own letter. One feature I wish it offered was the ability to customize the
drive label, which defaults to “Google Drive” if you just have a single account
connected, or “<email address> - Google Drive” (truncated based on the max
character length of this field) if you have multiple accounts connected. You
can change the label yourself in File Explorer, but the change is not preserved
between reboots.
Summary
Overall, I would say the new app is an improvement over the
old one. Google has not forced Backup and Sync users to update yet, but you also cannot
download Backup and Sync anymore. The download page only offers
Drive for desktop for download. See the full feature comparison listing.
Last Updated: 1/3/2012
My blog is actually hosted on blogger.com. The way I'm able to display my blog posts here is by parsing the blog's RSS feed. RSS feeds are used by blogs to help alert their avid readers whenever a new post is created. They are just XML files that contain data on the most recent blog posts. They include things like the title and publish date of each post, as well as the actual blog post text. I can use most of the data from my RSS feed without any trouble, but there are a few things I need to tweak in order to display everything properly.
 View the source
Fixing the code samples
One tweak is fixing the code samples I often include in my posts. Blogger replaces all newlines in the blog post with <br /> tags. This is a problem because, due to the syntax highlighting library I use, the <br /> tags themselves show up in the code samples. So, I need to replace all of these tags with newline characters. However, I can't just replace all <br /> tags in the entire blog post because I only want to replace the tags that are within code samples. This means that I have to use something a little more complex than a simple search-and-replace operation:
$content = //the blog post
$contentFixed = preg_replace_callback('~(<pre\\s+class="brush:.*?">)(.*?)(</pre>)~', function($matches){
	$code = $matches[2];
	$code = str_replace('<br />', "\n", $code);
	return $matches[1] . $code . $matches[3];
}, $content);
Here, I'm using the preg_replace_callback PHP function, which will execute a function that I define every time the regular expression finds a match in the subject string. I know that each code sample is wrapped in a <pre> tag and that the tag has a class attribute whose value starts with "brush:", so I use that information to find the code samples. Then, for each match the regular expression finds, it calls my custom function, where I have it replace the <br /> tags with newlines.
Fixing the dates
Because the publish dates of each blog post in the RSS feed are relative to the UTC timezone, I also have to make sure to apply my local timezone to each date. Otherwise, the dates will not be displayed correctly (like saying that I made a post at 2am in the morning).
$dateFromRss = 'Tue, 20 Dec 2011 02:30:00 +0000';
$dateFixed = new DateTime($dateFromRss);
$dateFixed->setTimezone(new DateTimeZone('America/New_York'));
Adding Highslide support to images
One extra feature that I included is adding Highslide support to each image (Highslide is a "lightbox" library which lets you view images in special popup windows). To do this, I load the blog post into a DOM, use XPath to query for all links that have images inside of them, and then add the appropriate attributes to the link tag.
$content = //the blog post

//XML doesn't like " ", so replace it with the proper XML equivalent
//see: http://techtrouts.com/webkit-entity-nbsp-not-defined-convert-html-entities-to-xml/
$content = str_replace(" ", " ", $content);

//load the text into a DOM
//add a root tag incase there isn't one
$xml = simplexml_load_string('<div>' . $content . '</div>');

//if there's a problem loading the XML, skip the highslide stuff
if ($xml !== false){
	//get all links that contain an image
	$links = $xml->xpath('//a[img]');

	//add the highslide stuff to each link
	foreach ($links as $link){
		$link->addAttribute('class', 'highslide');
		$link->addAttribute('onclick', 'return hs.expand(this)');
	}

	//marshal XML to a string
	$content = $xml->asXML();

	//remove the XML declaration at the top
	$content = preg_replace('~^<\\?xml.*?\\?>~', '', $content);

	//trim whitespace
	$content = trim($content);

	//remove the root tag that we added
	$content = preg_replace('~(^<div>)|(</div>$)~', '', $content);
}
As you can see, the blog post text has to be awkwardly manipulated in order to be read into a DOM and written back out as a string. That's why I have a lot of comments here--when I have to revisit this code in 6 months, I won't be totally confused.
Caching the RSS file
One last thing to mention is that I cache the RSS file so that my website doesn't have to contact Blogger every time someone loads this page. When the cached file gets to be more than an hour old, a fresh copy of the file is downloaded from Blogger.
Back to top
Copyright (c) 2010-2026 Michael Angstadt


